---
title: Enabling CrowdComms API and MCP Access
description: Linking Custom and API integrations into the CrowdComms CMS
---
[Skip to content](https://knowledgehub.crowdcomms.com/enabling-crowdcomms-api-and-mcp-access#main-content)
[](https://crowdcomms.com/)
- Home
- Products
- Pricing
- Blog
- Company
Open main navigation
Close main navigation
- Home
- Products
- Pricing
- Blog
- Company
- Contact us
Contact us
How can we help you?
- There are no suggestions because the search field is empty.
1. [Knowledge Hub](https://knowledgehub.crowdcomms.com/?hsLang=en-gb)
2. [Integrations](https://knowledgehub.crowdcomms.com/integrations?hsLang=en-gb)
3. [Custom Integrations & API](https://knowledgehub.crowdcomms.com/integrations?hsLang=en-gb#custom-integrations-api)
1 October 2026
# Enabling CrowdComms API and MCP Access
### Step 1: Request Access to Custom Integrations
Talk to your CrowdComms project manager and request that **custom integrations** be enabled for your event or platform. This is required before you can access the CrowdComms API and MCP settings.
### Step 2: Navigate to the CrowdComms API Settings
Once custom integrations are enabled, log into your CrowdComms platform and:
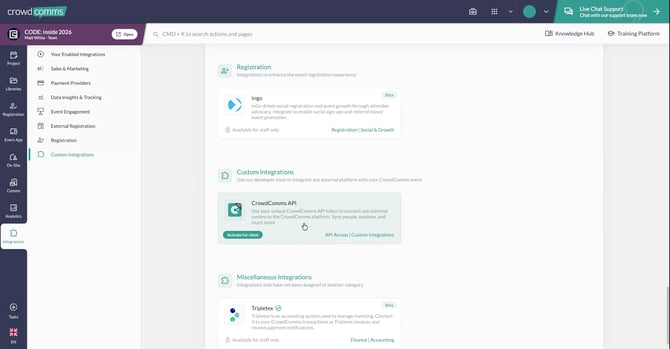
1. Go to the **integrations** section.
2. Open **Custom Integrations**.
3. Select **CrowdComms API** to view its configuration options.
### Step 3: Review the API Key and Public Integration Options
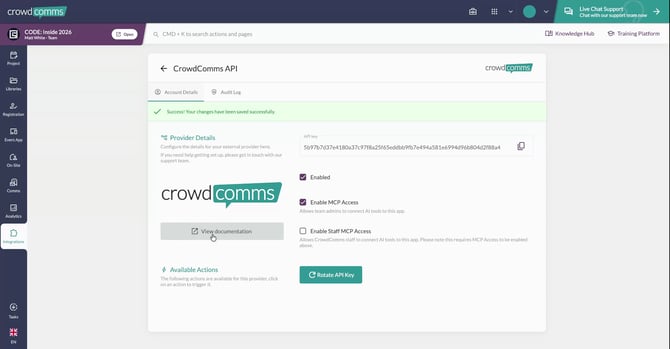
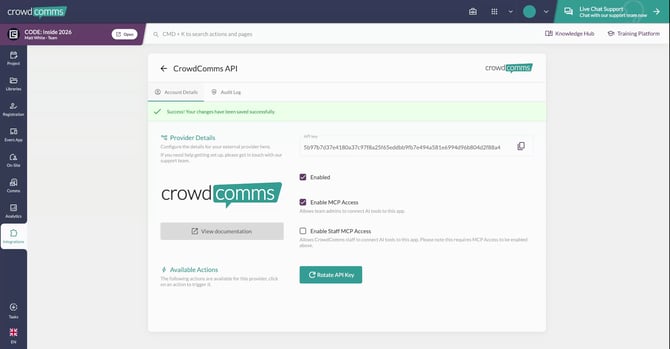
On the CrowdComms API page, you will see:
- An **API key** for public integration with the CrowdComms public API.
- An **Enable** toggle to turn the public API integration **on or off**.
- The **View documentation** button to find a full list of publicly available endpoints.
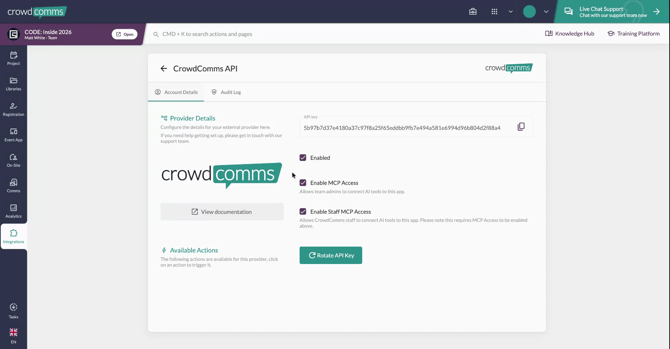
Use this section if your company plans to integrate your own custom software directly with CrowdComms.
### Step 4: Enable MCP Access and Staff Access Options
In the same area, you can configure MCP access:
- **Enable MCP access** to allow AI software (e.g., Claude, Cursor, ChatGPT) to integrate with your CrowdComms platform and perform tasks automatically.
- **Allow CrowdComms staff MCP access** if you want CrowdComms staff to connect their MCP to your platform for support or management purposes.
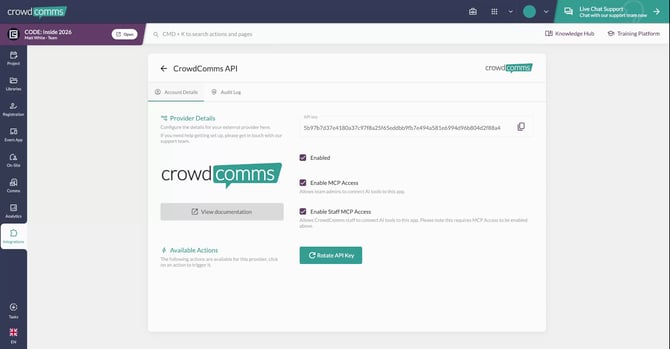
You can disable staff access at any time if you prefer MCP access to be limited to your own team and tools. However, MCP must be enabled for external AI tools to connect.
### Step 5: Use the API Key and Documentation for Custom Software
If you plan to integrate your own systems:
- Use the **API key** strictly for your company’s custom software integrations.
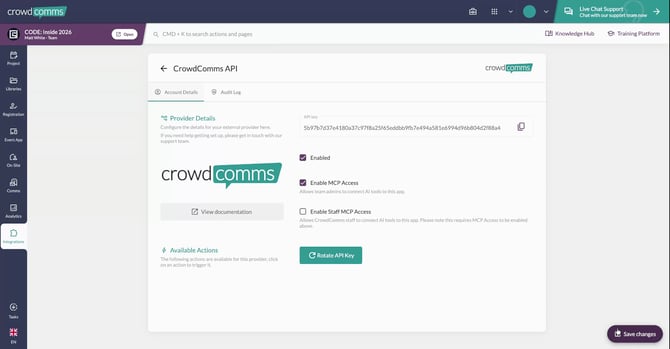
- Click **View documentation** to see the list of publicly available endpoints and their details.
For example, when a registrant completes a registration in your system, you can call a CrowdComms endpoint to automatically add them to libraries within the CrowdComms platform.
If you have questions about specific integration scenarios, contact your project manager.
### Step 6: Monitor Changes via the Audit Log
Before working further with MCP access, review the **audit log** on this tab:
- The audit log records every change made to the integration settings and identifies **which user** performed the change.
- It shows when a change was **initiated** and **finished**, the **triggered actions**, and whether the activity was **inbound** or **outbound**.
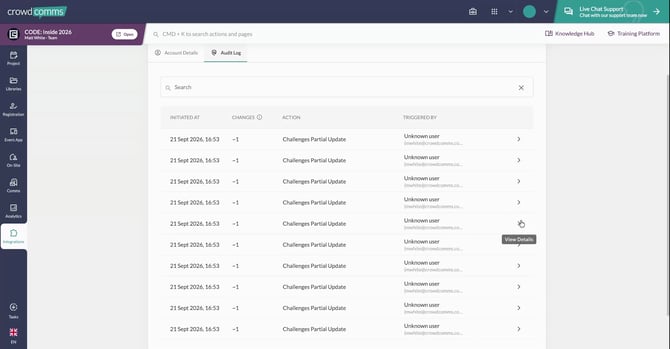
Use this to track configuration history and troubleshoot any integration issues.
### Step 7: Connect MCP Access in Your AI Tool
To enable MCP access in your chosen AI software:
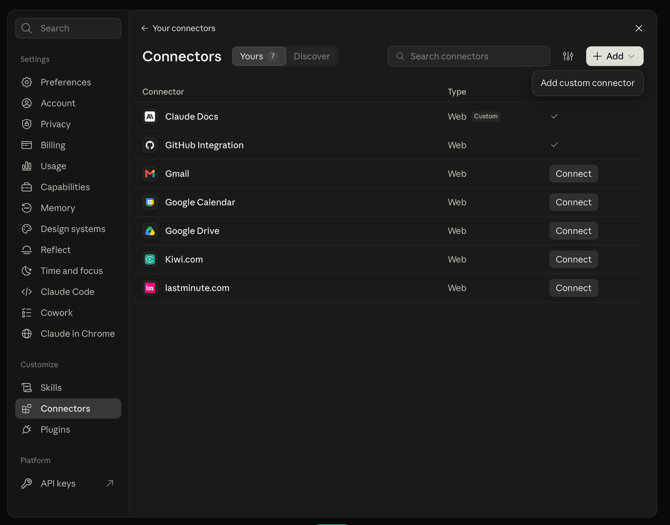
1. Open your AI tool (e.g., **ChatGPT**, **Claude**, **Cursor**). In this doc, we will use Claude
2. Go to its integrations or MCP/tools marketplace.
3. Add a new Custom Connector
4. Set the name to:
CrowdComms
5. Set the MCP URL to:
`https://mcp.crowdcomms.com`.
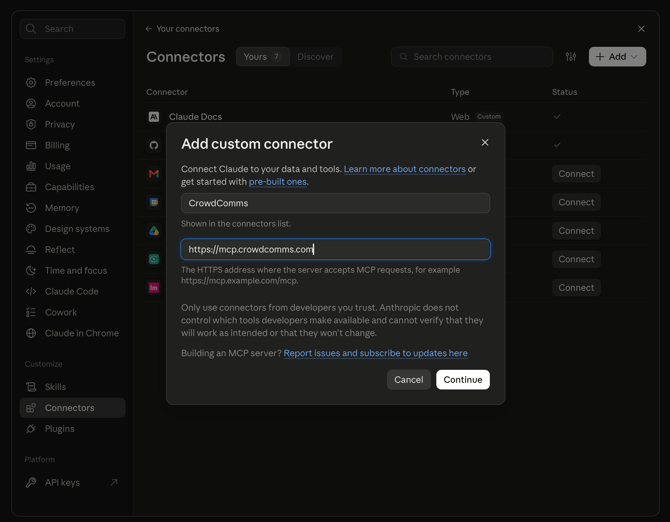
Once connected, you can instruct your AI agent to perform tasks on your CrowdComms platform, such as:
- Upload a list of delegates (e.g., “Upload these fifty delegates to the platform”).
- Create or update content (e.g., “Create a homepage using our branding”).
[.svg "CrowdComms Logo")](https://www.crowdcomms.com/)
[mailto:email@email.com](mailto:email@email.com)
Copyright © 2026, CrowdComms