Step 1: Access Invoice Settings and Enable Invoicing
Navigate to the Registration tab, then go to Tickets and Payments, and open Invoice Settings.
Here you can enable invoicing for your registration site.
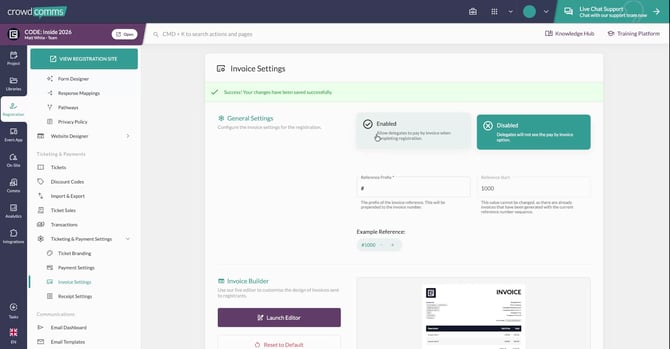
Once invoicing is enabled, you can:
- Add an invoice prefix.o
- Set a reference start number (Only available if there are no current registrants).
- Configure the invoice layout, including changing the logo, adjusting colours, and updating invoice details.
Step 2: Open the Form Designer and Confirmation Page Preview
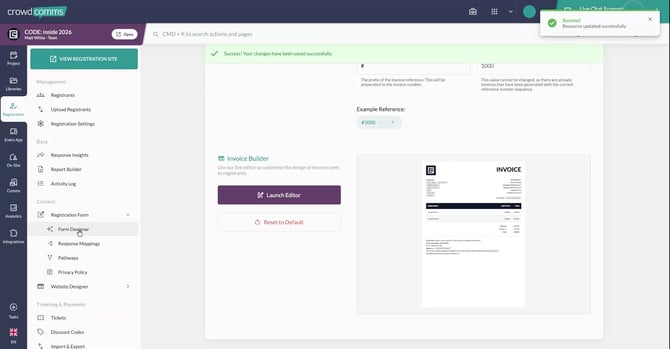
From the registration configuration, open the Form Designer to begin configuring your Confirmation Page.
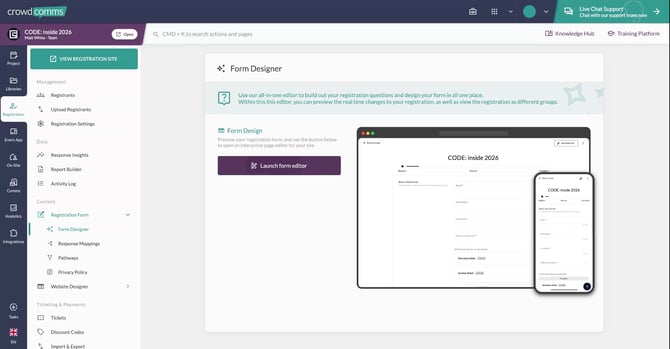
Launch the editor and start by populating the confirmation page layout and content.
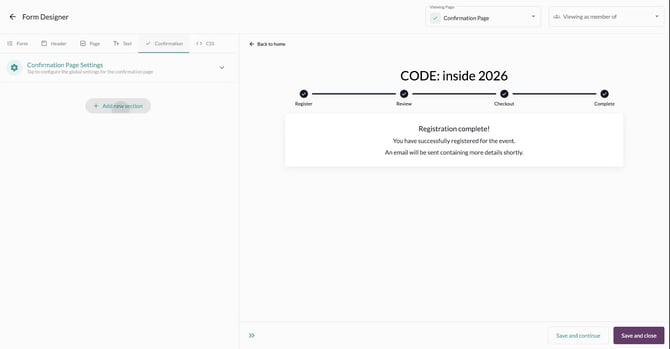
To work on the confirmation page, navigate to the Confirmation tab.
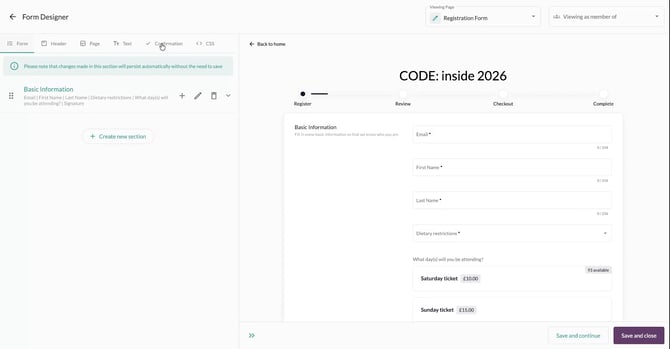
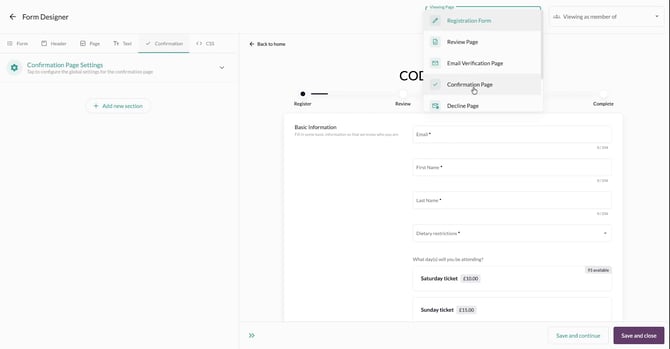
Then open the Preview dropdown options and select the Confirmation page option to change the preview to show the confirmation page.
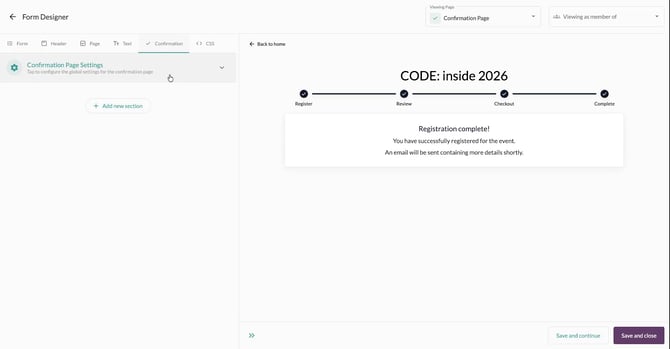
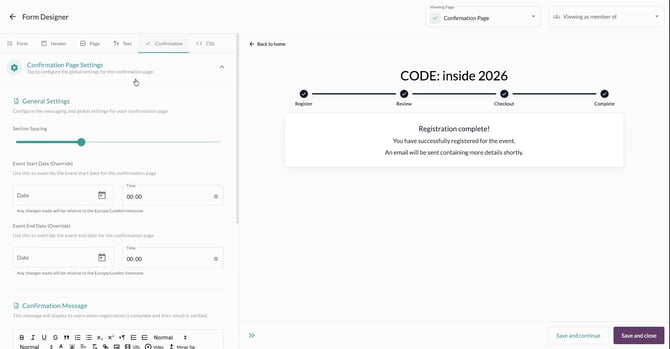
Clicking into the Confirmation Page Settings, you can adjust spacing, add dates, and include additional confirmation text or instructions.
Step 3: Introducing the widgets
iFrame Widget
The first widget to configure is the iFrame.
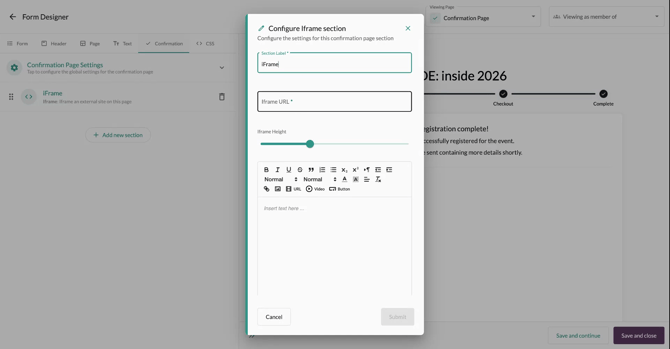
Here, you can:
- Define a label for the field
- Add an iFrame URL that should be displayed within the confirmation page.
- Adjust the iFrame height to suit smaller or larger embedded content.
- Add contextual text below the iFrame.
Rich Text Widget
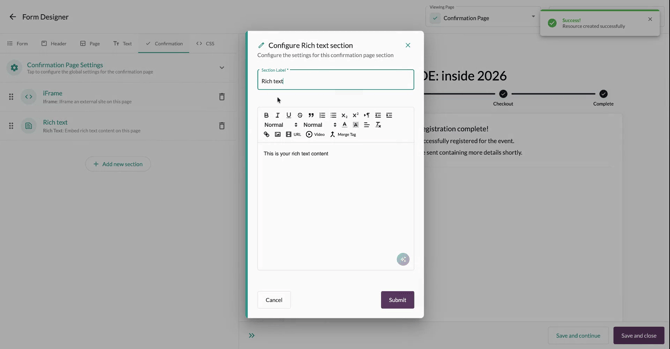
This widget allows you to:
- Add a label and body text.
- Useing standard formatting tools (bold, italics, lists, links, etc.) like a typical text editor.
Event Dates Widget
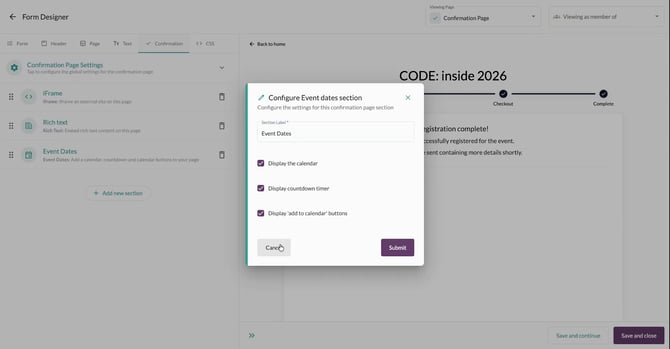
This displays key event information, use toggles to activate or deactivate the different options:
- Event dates in a calendar format.
- Countdown timer to when the event starts.
- Add to calendar buttons for registrants to export the file and import the event times to their calendar.
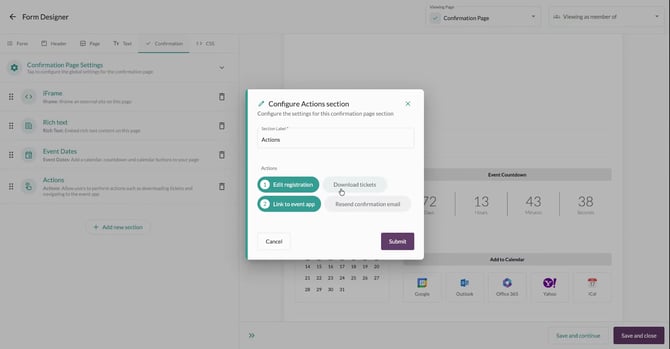
Actions Widget
Add the Actions widget to provide self-service options for registrants.
Use the toggles to enable or disable specific actions, including:
- Editing the registration.
- Linking to the event app.
- Downloading tickets.
- Resending the confirmation email.
The order in which you enable these actions, dictates what order they appear in.
Additionally, depending on your registration site configuration and settings, some actions may not be available.
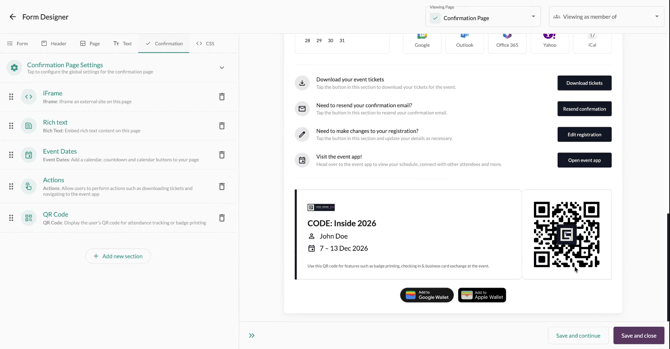
QR Code Widget
Add this so registrants can easily access their tickets on-site.
The QR code can be scanned to track entry into a session or the event.
Registrants can add the ticket to their Google Wallet or Apple Wallet through this widget too.
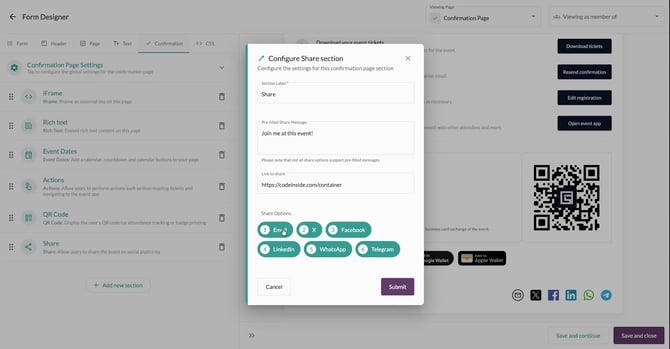
Share Widget
Add the Share widget to enable registrants to promote the registration site through multiple media platforms.
Use toggles to turn on or off any of the available social media channels.
You can also:
- Add a pre-filled share message.
- Define the link to your registration platform.
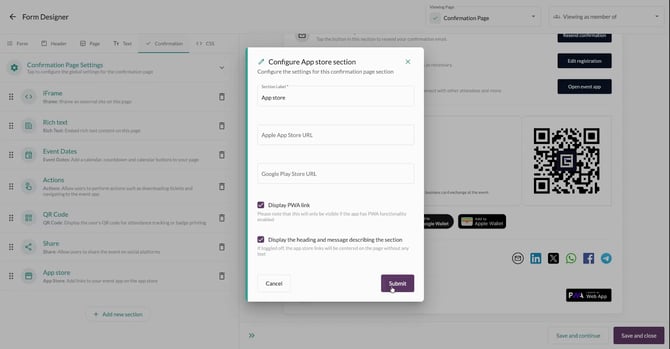
App Store Widget
Add the App Store widget to direct users to your event apps.
In the App Store widget, configure links to:
- The Apple App Store.
- The Google Play Store.
You can also:
- Display a PWA (Progressive Web App) link so users can install the web app directly without visiting an app store.
- Show or hide the widget heading and message.
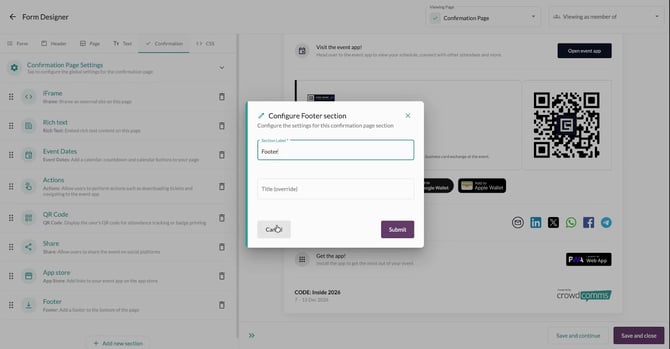
Footer Widget
Add and configure the Footer section of the confirmation page.
The footer automatically:
- Displays the registration event name.
- Shows the event dates.
- Includes the CrowdComms logo.
You can override the footer title by editing the settings if you wanted to display something separate from your registration title.
Guest Management Widget
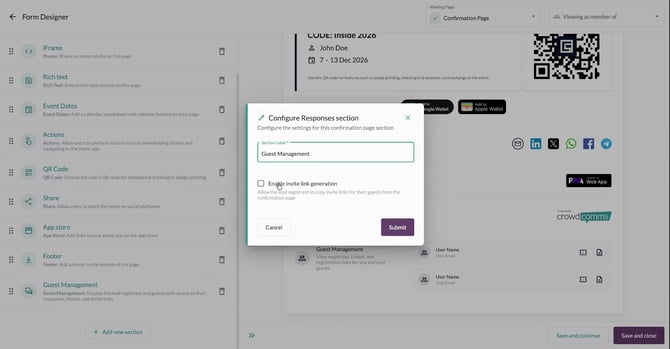
Enable the Guest Management feature if you support guest registrations (e.g., assistants registering on behalf of VIPs).
Guest Management allows users to:
- View the tickets their guests have registered.
- Review responses to the registration form.
You can enable or disable invite link generation, which allows users to copy a registration link and send it directly to their guests.
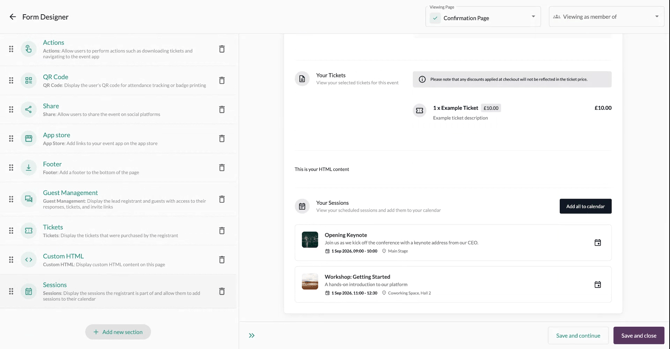
Tickets Widget
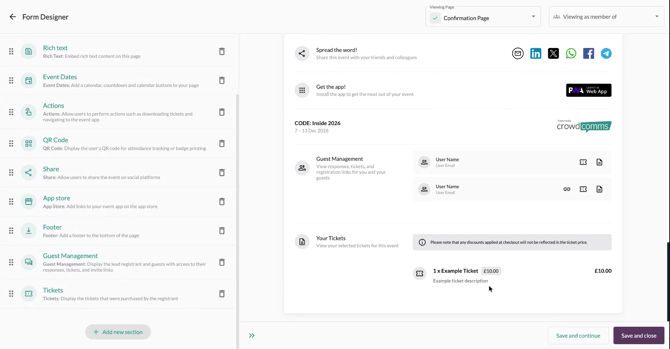
In the Tickets widget, you can show a summary of purchased tickets on the confirmation page.
The Tickets widget displays:
- Which tickets were selected and whether they are already paid for.
- The price of each ticket.
- The quantity of tickets purchased.
Note: Any discounts applied will not be shown here; only the ticket prices and counts are displayed.
Custom HTML Widget
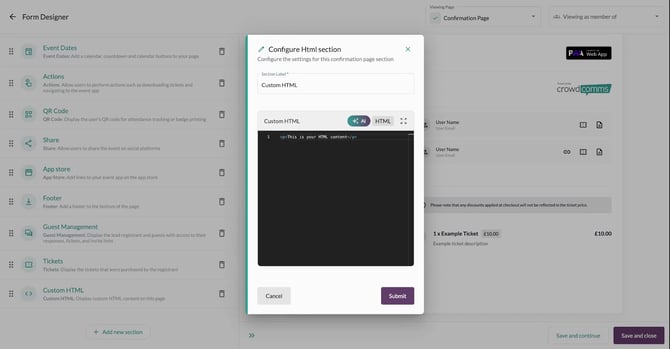
Use the Custom HTML widget to insert your own HTML content.
You can:
- Add interactive content using JavaScript.
- Build fully custom-branded sections that match your design.
Sessions Widget
If you have already populated the Sessions in your registration site, add the Sessions widget to the confirmation page to let users:
- View the sessions they are registered for.
- Add individual sessions, or all sessions, to their calendar.
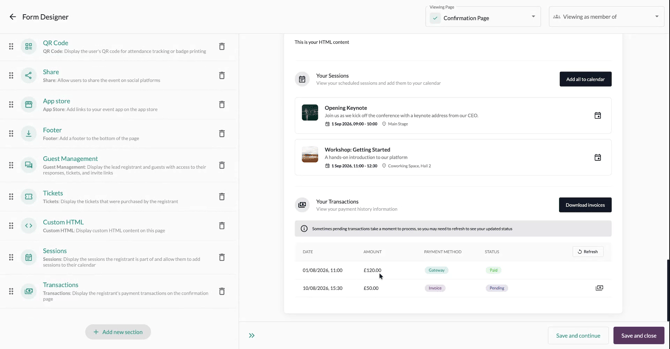
Transactions Widget
Finally, add the Transactions widget to show payment details. This displays:
- All tickets purchased.
- The status of each transaction.
- The payment method used.
Users can press the Pay button to immediately pay outstanding invoices for their tickets.
When viewing this widget in the preview window, dummy data will be presented.
Step 4: Viewing the Confirmation Page
After selecting the widgets that you plan to use in this configuration, proceed to test the flow by registering.
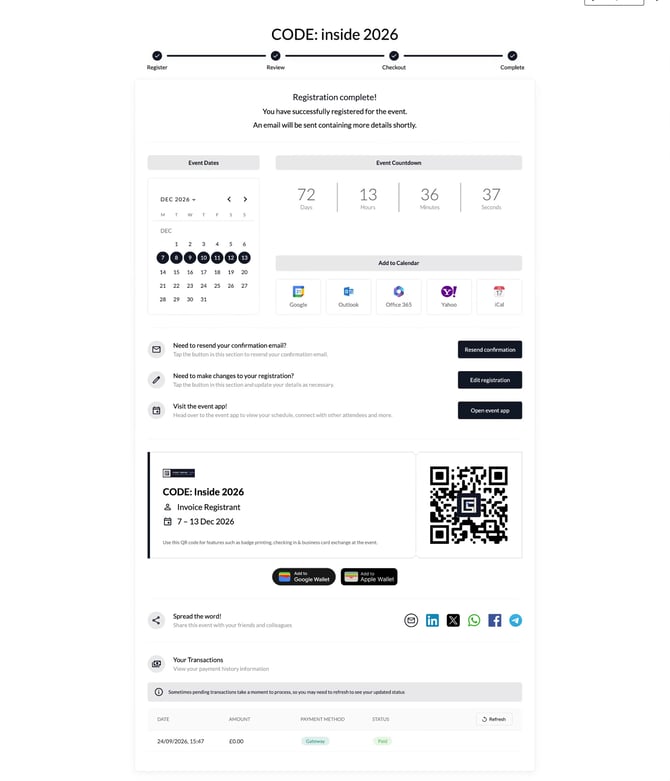
In the below example you can see:
- The event countdown, dates, and add to calendar buttons.
- Action buttons to open the event, edit the registration, or resend the confirmation email.
- The ticket QR code ready to be scanned on-site.
- Share options for social media.
- Transactions showing the purchased tickets, including any discounts applied (for example, a discount code that reduces the total to zero).