
Step 1: Open the Attendance Collections Area
Navigate to the onsite section of your CMS and open Attendance Collections. From here, either create a new attendance collection or edit an existing one.
Step 2: Enable Ticket-Based Collection Type
Within the attendance collection settings, change the Collection Type to Tickets. This enables multi-ticket selection and ensures the system lists the tickets associated with a user’s registration profile, instead of using the badge linked to their profile.
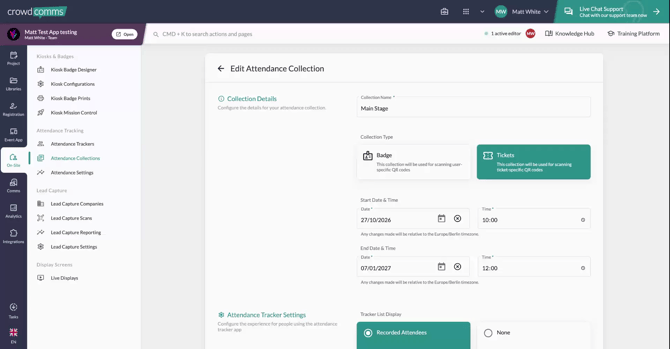
Step 3: Select Valid Tickets for the Collection
In the Valid Tickets section, select the specific tickets that should be available for this collection. This filters the list so that only the relevant tickets appear when performing attendance tracking for this collection type.
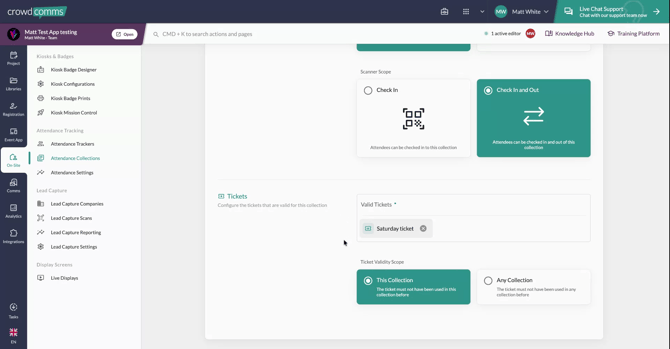
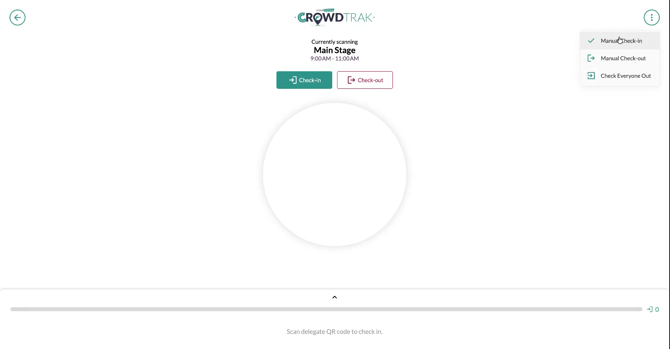
Step 4: Open the Multi Check-In Pop-Up
When you scan a user’s badge or perform a manual check-in for that collection, you will be presented with a pop-up.
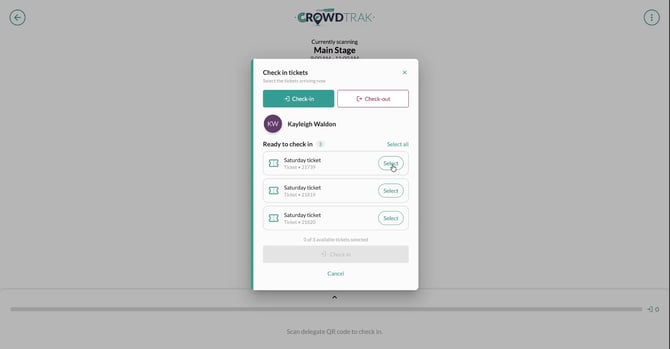
- The user’s name
- The action mode (Check In or Check Out)
- A list of all tickets relevant to this collection
Step 5: Check In Multiple Tickets
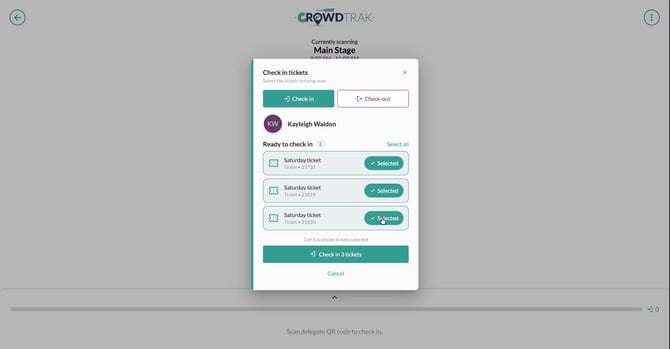
To check tickets in, use the pop-up’s ticket list.
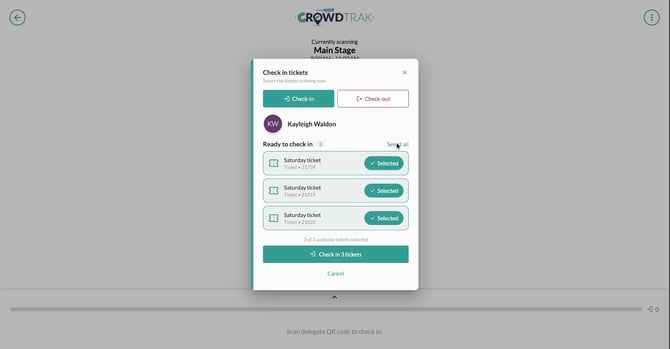
You can:
- Select any individual tickets you want to check in, or
- Use the Select All button to check in all listed tickets at once
Step 6: Check Out Previously Checked-In Tickets
To check tickets out, switch the pop-up to the Check Out action.
Only tickets that are already checked in and selected will be displayed here.
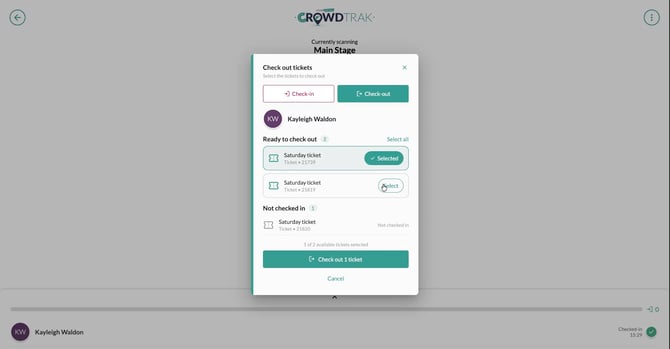
You can:
- Select specific tickets to check out, or
- Use Select All to check out all displayed tickets in one action
Step 7: Switch Between Check-In and Check-Out Modes
You can switch between Check In and Check Out modes at any time in the pop-up by using the two buttons at the top of the screen.
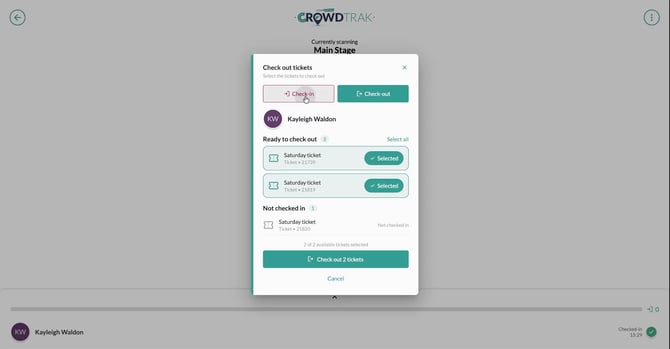
Simply click the appropriate button to toggle the mode and then proceed with selecting and processing tickets.